Tuesday, May 8, 2012

Disastrous Cakes

Before I get into this post, just a little FYI. My home computer is currently down, which is why my blog is lacking these days. And will be for a while. I may be able to do some posts, sans pictures though. Which means the posts I do put up will probably mostly be me ranting about one thing or another....but I tend to enjoy a good rant now and then, so that might be fun.

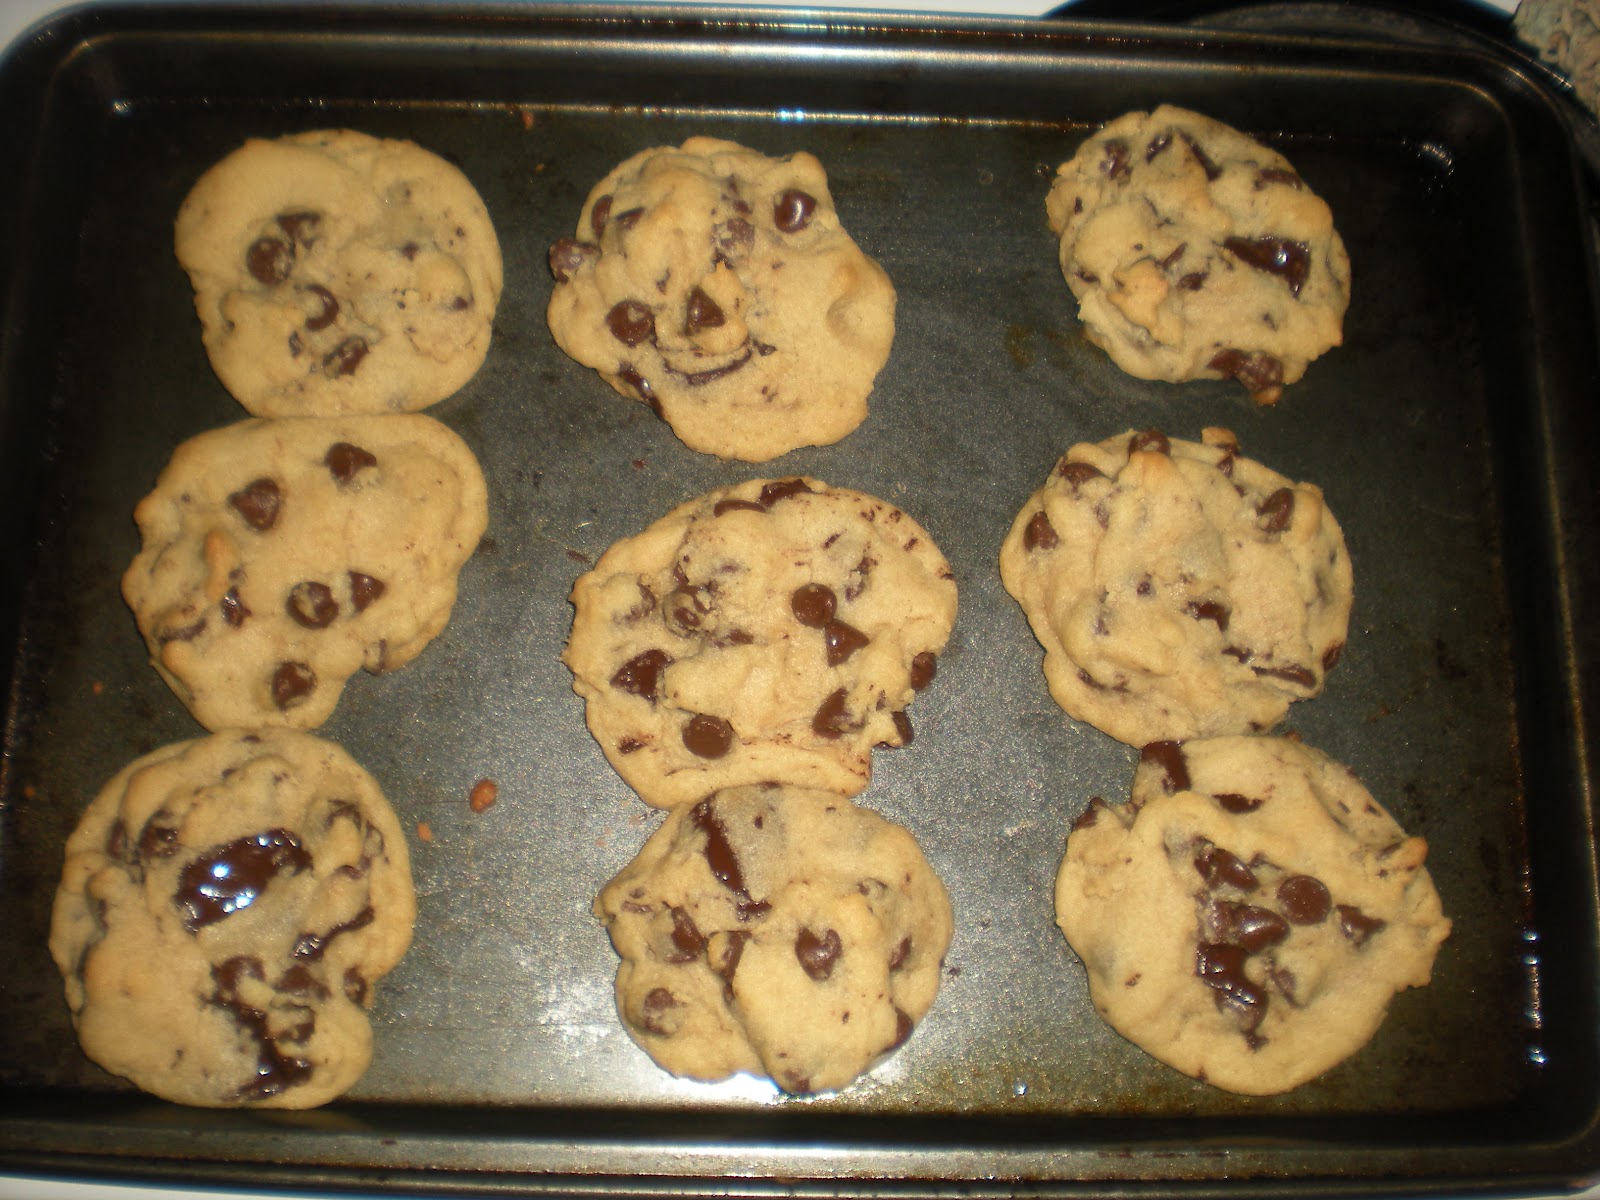
Now for the meat...cake...something...of this post.

I have come to the conclusion that I hate baking cakes. At least...I hate baking cakes in my oven...

It is an apartment sized oven, so two round cake pans do not fit side by side, and apparently said oven is not level either, so that means that my round cakes are uneven, which makes everything just that much more difficult to work with.

Let me tell you about the last two cakes I tried to make made (or..almost made - see Cake Disaster #2).

The first was my sister's birthday cake. I was really excited (yet also very nervous) about this one! White cake, with each layer cut in half, lemon butter in between each layer, and white icing. Doesn't sound so difficult, right? The main thing I was worried about while making this cake was cutting each layer in half, so I (since I was being marginally lazy, and didn't want to ruin a from-scratch cake), bought two cake mixes...JUST IN CASE. And good thing, too.

So, I bake my first cake...and after trying to fit both pans in the oven at the same time, ending with them being diagonal to each other, and having to turn them when they partially cooked, they came out of the pans easily, and were set on the cooling rack to cool before I sliced them in half. One of the rounds was uneven...but I could deal with that.

And then, after about an hour of cooling, I picked up one of the rounds, oh so carefully, to put it on a plate and into the fridge for 15 minutes so it was even easier to cut in half...and it broke. Yep, it broke. Boy did that make me unhappy.

Good thing I had another cake mix, right?

So I started baking that one. Again, everything came out fine, other than being a little uneven, it cooled, I put it in the fridge, and then began the slicing. A little uneven, since I can't cut anything in a straight line, but, whatever! It worked! So, I started putting the lemon butter in between the layers....and then I let it sit on the table for 5 minutes. Oops. Bad idea. When I came back into the kitchen, the entire thing had slid off. Thanks, lemon butter. So, I tried to make it stand upright again, and put it in the fridge so it set a little, and got to making the icing.

This is when disaster number 438729432 of the day came about. I start mixing up the icing with my trusty hand mixer, mixing, mixing, mixing....and then not mixing anymore. Oh, yes, I burned the motor out in that hand mixer of mine....halfway through making the icing. Deep breaths ensued. Luckily my sister said that I could come down to her place early and finish it off there. So I start packing everything up, open the fridge to take the cake out and......it slid some more and the layer of cake broke. Good thing my sister just wanted to eat the cake and didn't really care how it looked...right?

More sliding occured during my half hour drive down south to her house. Once I was there, I finished making the icing, and started icing the cake. I randomly decided to plop that third extra layer of cake on top so that maybe the top of the cake wouldn't look so disastrous. And it didn't! The top looked really pretty. Thanks to my sister-in-law, who told me how to make nice looking roses on top with a decorating tip. But the sides? Oh boy. The sides of the cake looked like they were decorated by a 3 year old. *facepalm*

My sister got a good laugh out of it, and at least it tasted good.

Cake baking disaster #2.

A friend came over a couple of weeks ago, because we decided we wanted to bake a cake, and I found what I thought was a really good recipe. So, we mix up the cake (with a whisk since, well, my hand mixer's motor blew during the last cake disaster), and stick it in the oven diagonally. It's baking...and baking...and...why does it smell like it's burning? Crap. I open the oven door, and the cake has overflowed onto the bottom of the oven, cooking onto the burner, and smoking like crazy. Sigh. We take the cakes (not anywhere near cooked, mind you), out of the oven, open windows, leave the oven door open, and toss the cakes. Now my entire apartment smells like fire. Including me, and my hair. I hate when that happens. How freaking annoying. Then, I had to scrape partially cooked/burnt/raw cake from the bottom of my oven. Ew. Good thing I apparently always have backup cake mixes? After venturing out at midnight to try to find some eggs since we used all of what I had, we came back and successfully made cupcakes. Because,  yes, cupcakes I can do. Even if they were in halloween cupcake papers.

Moral of the story? ...I should only bake cupcakes or 9x13 cakes in my oven. Nothing else will do...at least not until my sister's birthday next year, since I will always make a cake for her if we live in the same city, no matter what I have to go through!

Monday, April 16, 2012

Granola, specifically Love Crunch

Hi, I've recently jumped on the granola in the yogurt bandwagon, and I wanted to tell you about it. You can read my Yogurt Parfait post, where I show you how I make my extremely simple yogurt parfait, but I wanted to tell you a little bit more about granola. Especially this new granola I found...thanks to one of the blogs I read!

So, when I first started making the yogurt parfaits, I just used this granola that a friend gave me, because, um, the textures were weird? I don't know. I had it in my cupboard, so I thought I'd use it up. It was just a box of some random Organic granola with raisins and almonds in it. It was good! I enjoyed it. But then I ran out of it. I thought I'd try a different kind of granola, because, why not? I really didn't have any other reason for trying something new, except that I felt like it. Nothing wrong with that!

And then I came across something that might cause death by granola over-dose.

It's called Love Crunch, and it's made by Nature's Path. I don't generally go out hunting for organic things, but this granola, talked about in this blog post, made me want to try it SO BAD. I even entered the giveaway she was having. Alas, I didn't win. I wasn't sure if this stuff was sold in Canada, but I HAD to figure it out. I did some quick searching, and found out that it was sold at Loblaws (Superstore), a bunch of other places, and London Drugs. On Monday, I went to Superstore at lunch to see if they had it there, because I thought it would probably be the best price there, but sadly they didn't have any. At least no where that I could see. Back to the office with me. I couldn't get it off my mind for the rest of the day, so Monday after dinner/living room yoga/lazy time, I decided to get off my butt and go to the closest London Drugs to see if they had it.

Drum roll please.....

They did! Oh boy I was excited. But, what kind was I supposed to choose? There are four, the Aloha Blend, which has coconut, white chocolate and pineapple; Apple Crumble has cinnamon, green apples, and pecans; Dark Chocolate and Red berries has, well, dark chocolate and red berries; and the Carrot Cake which has carrots, pineapples, cinnamon, raisins and pecans.

I ended up going with the Carrot Cake flavour. My goodness it did not disappoint. I ripped into the bag when I get home and had a handful. And then maybe another handful. This was going to be great in my yogurt parfaits! Lunch on Tuesday was just that. Vanilla 0% Fat Greek Yogurt, strawberries, and Carrot Cake granola. Filling and so so good!


[Picture Source here]
I am so very excited to try the different flavours of Love Crunch once I run out of this kind. And I'm pretty sure that isn't going to take very long. It's dangerously good. I'll let you know what my favourite ends up being once I try them all.

I think that you should find it if you can. Or let me know if you have any other kinds of granolas that you really like, because I'd love to try out some others! I bet this would be good with milk too, but since I'm on my yogurt and granola kick, I think I'll stick with that for now.

At some point I'd really like to try making my own granola. I don't think it would be that difficult? I just haven't gotten around to it yet. Does anyone have any good recipes for homemade granola? Share them with me!

Thursday, March 29, 2012

Upcoming Easter Weekend Shenanigans

I am SO excited for Easter. I like turkey dinner, I like  love chocolate, and long weekends are awesome. Especially long weekends where I get to go home! Home is where my parents live, and where I grew up. A small town in BC, that you've probably never heard of. Two of my brothers also live in our around the same town, so that means I get to see them and their wonderful babies/kids too! Yay for nieces and a nephew! I'm taking an extra day off of work, and making Easter weekend a 4 day weekend, rather than just 3, because I have to drive six seven and a half hours to get home, and having only one day there makes for a lot of time spent in the car, and not enough time to visit, and do fun things LIKE BAKE WITH MY DAD.

Ok, so everytime I go home, I do my best to bake something. Usually I find something bread-like, since I'm not very good at it yet, and my dad is, so I get him to help/do it for me, and then I take it home. Haha! Sometimes my mom sister-in-law and I bake cupcakes too! Maybe we'll get to do some of that as well.

This Easter weekend though, we have so many things planned. And by so many I mean a few, but since I'm only there for two full days, it will probably take up a lot of time. First, both my parents want to see The Hunger Games, so we're going to go to the theatre to see it! I've seen it already, but I was really impressed, and so I'm looking forward to going again, especially with them! Family movie night! Maybe some of the other family members will come too. Who else is coming? Brother? Next, my dad and I are going to make bagels. Home made bagels are where its at. And my dad is like, the master. He made these bagels for my sister last time he came to town, and I stole one from the batch. Best. Bagel. Ever. Not even joking a little bit. So, we're going to make the same kind (cheddar and onion) as well as brown sugar maple pear. Doesn't that sound just absolutely amazing? I can't wait. After that, my dad and I are going to attempt to make turkey dinner while my mom directs. Usually she makes this big dinner, but this year I want to, and my dad will help, and she will tell us how to do things properly. Sounds like fun. :D Oh, and obviously I will have to make dessert for that dinner too. I haven't figured out what yet, but does anyone have any suggestions? I don't know if Pumpkin Pie is an easter type dessert, but not that. I don't really like pumpkin pie. Hopefully I get to make some cupcakes in there at some point too. We'll see how that goes!

You better believe that I will be posting recipes for most/all of the things we make that weekend.. Though the turkey dinner post may just be one big post, and not each separate dish.

OH, and! My dad is going to BBQ me stuff while I'm home, since I don't have a BBQ here, and I feel BBQ deprived. (Yes, I realize I just said BBQ three times in that one sentence). I am really very excited for that as well.

Overall, I think the weekend will be a blast. Too bad the rest of my siblings won't be able to make it. That would be fun, and a full-house! Fuller than the Full House TV show. Ha ha ha..Ok that was lame.

Now I'm going to go finish planning what else I'm going to do while I'm home, and bug my dad about what kind of stuff he's going to BBQ for me!

Wednesday, March 28, 2012

Buffalo Chicken Burgers

I have a thing for burgers. There, I said it. Burgers are my favourite meal, and I tend to be that annoying person who gets burgers no matter what restaurant I go to. Boring, original, why don't I try something new? Well, because I like burgers, ok? I don't actually make burgers all that often at home, so it's nice to get some once in a while. Though, I have to admit, no burger will ever compare to my dad's homemade burgers. Hear me? Never. I know exactly what he does to them, and I try to replicate this, but mine don't taste the same. That might have something to do with the fact that when he says "this, OR this" I hear..."this AND this" and just tend to throw in a bunch of things into my hamburger meat. What can I say, I guess I don't listen very well.

Anyway, that up there was all about beef burgers. But I made buffalo chicken burgers! They were really really good! I usually go for beef burgers (clearly), but I thought I'd try something new. I hunted around the internet for a bit to see if I could find any good recipes, but in the end I just used the amount of Buffalo Wing sauce that someone had suggested, and then the spices I used were just whatever I found in my cupboard that I thought might be tasty in a burger. Oh, and cheese. Yep, took someone elses advice and put cheese in there, too. It was a good idea.

Unfortunately I'm bad at measuring spices. I tend to just sprinkle some in until it looks good, and then I hope for the best. Safe, right? Maybe I should start measuring so that I can actually tell you how much to put in, instead "A little of this, and a little of that". Anyway, they turned out really well. The only thing I'll do differently next time is add more buffalo sauce into the meat. There was only a hint of buffalo in the burger once it was cooked, and sometimes I like burning my face off a little bit. Ok ok, that was somewhat of an exaggeration, but I do like it to have a little bit of  heat. If I have milk near by so that i can counteract it, and have my tongue only burn a little bit. I don't like it so hot that I sweat though. You're supposed to sweat at the gym, or playing sports, or doing some sort of activity, NOT when you eat.

Ok, tired of my rambling yet? Let's get to the recipe.

Buffalo Chicken Burgers

1 egg, beaten
Half a package of ground chicken
Some oats (uh, yeah, I didn't measure these either...add enough to make sure that it isn't too wet, and the meat sticks together. 1/4 - 1/2 cup I think. I also ended up adding some bread crumbs. No need to add both, I just did)
Garlic Powder (minced garlic of the fresh or jarred variety would work too, I just didn't have any)
Salt
Pepper
Celery Salt (oops. Double dose on the salt here, but I didn't use that much regular salt)
Grated cheddar cheese (or any other kind of cheese you desire)
1/8 cup Franks Buffalo Wing Sauce (I actually measured this! If you like a bit more kick, add more!)

Mix all these things up together, until you are able to form them into patties without them falling apart. If they seem like they are going to, add some more bread crumbs or oats.

Form into patties, and either BBQ, or place in a hot frying pan (I think I cooked these at about 4), with a thin thin layer of oil covering the bottom. Cook 8-10 minutes on each side, or until they are cooked through FULLY. Don't leave any pink in there, people. That's how you get sick.


While these are cooking, sautee some onions. I chose red, because that's what I had.

Melt some more cheese on top of the burgers!

Stick in a whole wheat bun, with toppings of your choice, and voila. Dinner.

If you pair these with something like sweet potato fries, you'll have a heck of a good meal. I'll tell you how I learned to make sweet potato fries another day. Delicious!

Tuesday, March 27, 2012

BBQ Carmelized Onion Cheddar Chicken

I'm always trying to find new and exciting ways to spice up chicken. Sometimes it just gets boring to put salt, pepper, and garlic on a chicken breast and bake it in the oven.

As I was driving home one night, I was trying to decide what I could do with chicken for dinner. Then it hit me! I could carmelize some red onion, and then stuff the chicken with that, bbq sauce and cheddar cheese! All of those flavours are pretty tasty together, so it's a great idea, right?

Wrong.

Well, the stuffing of the chicken breast makes it a bad idea. Not the flavour combination. That was still pretty great. But, uh, I apparently can't cut the chicken just enough to stuff it. Nope. I either cut the entire way through, or just cut off a hunk of chicken from the whole breast, because I so cannot cut evenly.

Instead, I just put a layer of bbq sauce, the onions, then the cheese on top of the chicken, and baked it that way. It turned out really well! Though I still think stuffing it would have been more fun.

Ready for a super simple recipe?

BBQ Carmelized Onion Cheddar Chicken

Preheat your oven to 350 degrees.

In a small frying pan, sautee red onions until they are nice and carmelized.

Place chicken onto a cookie sheet, and season with salt and pepper.

Squirt on some of your favourite BBQ sauce.

Put a layer of sauteed onions.

Top with cheese of your choice. I ended up using both cheddar and mozzarella, because that's what I had!

Bake for 30 minutes, or until the juices run clear.

I had this chicken with asparagus and broccoli. Yum!

Hooray for quick and easy dinners!

Wednesday, March 14, 2012

Yogurt parfait

I have a new favourite breakfast. It's quick, and delicious, and can be changed up, mixed up, whatever way you like it!

AND it has a lot of protein in it, which keeps you full for hours! That is probably the best part, or maybe it's how tasty it is. Or, maybe how fast it is...I don't know. Everything about it is amazing!

And there is really no rhyme or reason to it, so you can make this parfait however you like. You could make it fancy, and dessert like if you wanted even.

But here is what I do.

I put some fruit in the bottom of a bowl. I like  blueberries! And strawberries! Any fruit will do though. Mine has been starting out frozen, so I thaw it out a little bit first.

Then, add a couple heaping spoonfuls of 0% fat greek yogurt (yes, greek yogurt, because that's where all the protein comes from!).

Finally, add a handful of your favourite granola.


Mix it all together, and enjoy! See, wasn't that easy?


Oh!! And sometimes I add a little squirt of honey, just for some extra sweetness.

If you want to make it a pretty little dessert, you could take a fancy glass, and do some layers. Berries, yogurt, berries, yogurt, and sprinkle granola on top. Or maybe you don't need granola on a dessert. Make sure the layers look nice in the glass! Good presentation, and yummy. Or use 0% Fat Vanilla greek yogurt for extra flavour. There are so many options. Play around with it, and make something delicious!


Monday, March 12, 2012

Chocolate Chip Cookies

I made cookies.

I shouldn't have, because cookies will be the death of me. If I make pretty much anything else, cupcakes, pie, cake, etc. I won't get the urge to eat them. But cookies? Oh man. I will devour them. And that's obviously not a good thing. Good while I'm doing it, but not good afterwards if you know what I mean.

These, I think, are my favourite cookies. These are my Grandma Marilyn's recipe,  even called "Grandma Marilyn Cookies" in my recipe book. There isn't anything extravagant about them, but they are just so good. The more chocolate chips the better.

This time, I wasn't sure if I had enough chocolate chips, so I actually cut up a couple chunks of baking chocolate (of the dark variety), and threw that into the cookie dough as well. If you're going to do this, I suggest making sure that they aren't stuck on the outside of the cookie dough ball when you put it on your cookie sheet. Or this will happen:


Which isn't necessarily a bad thing! But, they just look a little different.

I'm currently trying to hide them in my cookie jar (AKA a bean pot, but I'll tell you about that another time), so that they aren't sitting out on my counter where I can see them, and where I just want to eat them. But they are just SO TEMPTING.

Anyway, make these, and try not to eat them. I dare you.


Grandma Marilyn Cookies

Preheat oven to 350 Degrees

In a bowl mix:
2 cups flour
1 tsp baking soda
1 tsp salt

In another bowl, with either a hand beater or stand mixer, beat:
1 cup margarine
1 cup brown sugar
1/2 cup white sugar

Then add:
1 egg
1 tsp vanilla

Mix the wet and the dry ingredients together, either with a wooden spoon, or in a stand mixer, and then fold in:
1 bag (or about 2 cups) of semi-sweet chocolate chips

Once this is done, you may want to test out some of the cookie dough (I don't REALLY recommend this because there are raw eggs so you might get sick, but I do actually think you should, because it's delicious. But don't blame me if you get sick).

Spray a cookie sheet with pam, and plop on some spoonfuls of the cookie dough, spreading them out evenly on the sheet.

Bake for 10-12 minutes, or until the edges turn slightly golden. I had mine in for about 11 minutes. I like my cookies lighter, so this worked out well.

Which one of these is not like the other?

Dance Dance Revolution, anyone?

Have you ever played Dance Dance Revolution (DDR)? I think the original version may be an arcade version or something, but they have made it into a game for Playstation 3 as well. You plug these mats in that have all of the shape buttons on them, and then the arrows for your feet, and you can dance on one of 4 different levels until your feet fall off.

Or just until you lose, and then it is someone elses turn, like I did on Saturday night.

Enter fun family/friend night at my sisters house.

My brother, sister-in-law and 3 month old niece came to visit this past weekend, which was pretty spectacular, because I quite enjoy baby snuggles, and, well, of course seeing my brother and sister-in-law, too. ;) My sister and brother-in-law just bought the DDR game for a wicked $15, and we all agreed it would be fun to hang out and play that for the evening.

My sister's friend and her husband came over to play as well, and brought their mat, so we could have dance-offs with two people. My nephew was able to play a few rounds before bedtime, and I must say, that boy has some mooooooves. Pretty awesome.

Now, let me tell you this one thing. I suck at dancing. I have no coordination, no rhythm, and I lost, pretty much every single dance-off.

Now, let me tell you this other thing. I'm competitive. Very competitive, and it runs in the family (I don't want to hear any denial from the siblings, because you all know it's true!).

Ok, so if we put this being a very poor dancing thing, and this being very competitive thing together, you'd think it would equal a night of just being angry that I lost the whole time, right? Well, I must be getting older and more mature or something, because, shockingly, I wasn't! It was SO much fun! I didn't think I'd enjoy something I was so bad at, so much. It was hilarious, difficult, sweat-inducing fun. Everyone that was there, I think, had just as much fun as I did, and I can't wait to have another DDR party. Seriously the most fun I've had in a long time. I'm surprised the kids didn't wake up, as we weren't quiet even a little bit!

As it turns out, the way to do well is to listen to the beat of the music, and try to follow along with the steps that way. I don't know if I didn't want to listen to the beat, couldn't listen to the beat, or couldn't multi-task and listen to the beat while watching the screen, (probably a combination of all of the above, resulting in the reason I have no rhythm), but it just wasn't working for me. Let's just add in here for the sake of my brother, who I am SURE is thinking this while reading this post: I just suck. Plain and simple. Next time I'll try to turn down the suck, I promise.

My brother and sister rocked at DDR. I have to point that out, because of that competitive thing :P There were plenty of rounds that they continuously won, and the winner of each dance-off got to keep on playing. So yes, you two are awesome. Even if I tried to push my brother off the mat to mess him up, he still kicked my butt.

Hopefully there will be a Round 2 of DDR at some point in the future. If so, I'm totally in.

Wednesday, February 29, 2012

Bad Drivers

I know I haven't been seen around these parts for a while, but I've sort of been busy lazy. And I haven't really done a lot of cooking or baking that is blog-worthy. All of last weekend I was fortunate enough to be fed by my sister, because my parents were in town, and that's always a great delight. It's always better when someone else cooks, don't you think? I should have taken pictures of what her and my dad made, but I didn't. Oops. I did help my sister make a peach/blackberry/raspberry crisp though. That was tasty.

Anyways, to the point of this post. I have a rant. I, at times, enjoy a good rant. Sometimes, I just like to get things off my chest, you know?

Right. So, bad drivers. Everyone sees bad drivers every day, I'm sure. You, and I, could very possibly be considered bad drivers at times (though, probably not, right?). But, there are some things that people do when they are driving around a 2 ton weapon, and yes, a car really is a weapon. If you don't agree with me, you're wrong. End of story. I have a few major pet peeves, which I will tell you about. Well, I'm sure there are more than a few, but these are the few that I have been seeing a lot lately, so that is why they come to mind. Maybe this will be a multiple-part post, who knows.

1) People who do not brush the snow off of their back windows. We live in Canada, folks. And it snows in the winter. Where I live, it sometimes snows in the summer. This means that you should buy a brush for your car, so you can brush the snow off, and scrape the windows when it's icy. Pretty sure these brushes cost $5. And if you're seriously too cheap to buy one of those, use your coat, it takes about 7.3 seconds to brush off the back window. And if you don't? How are you going to see stuff out of your back window? Sure, you have side mirrors, but using your rear view mirror is important. And if you have snow on your window, you can't use your rear view mirror. What if there is an ambulance or fire truck behind you, and your music is already blasting so loud you can't hear the sirens, and then you also can't see the flashing lights because you're the idiot who didn't clean off their back window when you left your house that day. Hi. Use your common sense. Or do you not have any?

2) People who do not use their signal lights. These babies are on your car for a reason. It barely takes any effort to flick the lever up or down, depending on which way you're going. For example, a good time to use your signal light is when you are changing lanes. It's really nice to know if someone is going to be cutting me off. At least if you use your signal light, I'll probably slow down and give you more room so it's easier for you to get in. Instead of you being a total douchebag, and just fighting your way in. That kind of crap causes accidents. And it also makes me yell at you if my windows are closed and you can't really hear me. Oh, but if you have snow on your back window, you probably would have barely been able to see me so close to you when you stupidly decided to change lanes without signaling anyways.

3) And finally, this:


Yes. People who suck at parking. That dirty little black car is mine, and the silver one is some anonymous person. Ok, so, backing into a parking spot is maybe a little more difficult than just pulling in the regular way. And, maybe backing into a parking spot is a little more convenient, because then you can just drive out of it when you leave. But if you suck at it? And you are going to be in the parking spot next to you when you do it, then just don't even try. Or, at least readjust your crappy parking job before you get out, leaving the person next to you having a difficult time opening their door, because you're so inconsiderate. It's not that hard to park a car. I promise. Sometimes it takes a little bit of practice, and you may need to try a couple of times before you get in the lines, but it's really and truly not that difficult. Especially if you aren't driving a massive vehicle that doesn't fit into a spot anyways. If you practice parking, and get better at it, I'll bake you cookies. How does that sound?

Well, that turned out to be longer than I expected. Glad I got that off my chest! Thanks for listening.

/endrant

Hope you had a good day!

Sunday, February 19, 2012

Whole wheat bread

Did you know that kneading bread is actually somewhat comforting? And a good way to relieve some frustration. Seriously. Get mad about something, and then go knead some dough. You'll feel better, and then you will almost have some delicious home-made bread.


But first you have to do some other things. Like, heat up some milk, let some yeast sit in water, wait for the milk to cool, add a few ingredients together, mix a little bit. And then....clean your counters off so you have space to knead the dough (ugh). It sure is worth it though. Even just the smell of bread baking in the oven is delightful. And that smell makes everyhthing feel cozy, and like you're back at your parents' house when they made bread every week or two. Ahhh the good ol' days when I didn't have to fend for myself.


When I told someone that I made bread, they said something along the lines of "Oh, you have a breadmaker?" Uh. No. I made those loaves by hand, friends. Breadmakers? I scoff at you.

Alright, so maybe breadmakers are easier? I don't really know, but that's now how I was taught to make bread. Plus, if you use a breadmaker, then you can't relieve that frustration. So, that's another reason breadmakers are out of the question.

I asked the bread-man (AKA, my dad), if he could help me with the recipe, since the only one I had made, I don't know, 25 loaves or something insane like that. He promptly sent me a recipe that I could use to make two loaves of bread, making them partially whole wheat. Hooray!

Note: Baking bread is NOT fast. You can't spend an hour working on this, and come out with delicious bread. It takes time. You have to wait for the bread to rise. Then you have to wait for it to rise again. That right there is 2-4 hours. And don't forget the prepping before the rising, and the baking after the rising. Plan to do this on a day when you have a few hours to spare.

One of the greatest things about baking bread at home is that you will likely have all of the ingredients in your house already. This means you don't have to spend insane amount on loaves of bread at the grocery store. A definite positive in my opinion.

Another note: This may come in handy. When prepping for baking bread, or really, anything, it might be a good idea to put your ingredients together in separate little bowls, so that you do'nt forget anything. You know, like they do on the cooking shows on the Food Network? I wish I had that channel. But if I think about it, it's probably a good thing I don't, because then I wouldn't do anything except for watch all the awesome shows on it...anyway...I digress. Put each ingredient in a little bowl, and then go back and check your recipe, making sure you have everything. That way, you are less likely to forget an ingredient, especially an important one. Like brown sugar. I don't do this, but maybe I should start. The only con is that afterwards, there are more dishes to do. Blech.

Whole wheat bread

1 tsp sugar                                           
1/2 cup warm water
1 1/2 tsp active dry yeast                                   
 
2 tbsp sugar
2 tbsp margarine, softened
2 tsp salt
2 cups milk, scalded and cooled  (dissolve the sugar, salt and margarine in the milk while it’s hot and let it cool)
2 1/2 cups whole wheat flour
 
4 cups, approximately, white flour


First three items together to dissolve the yeast. I also added in the milk, margarine, sugar and salt at the same time, once it was cooled enough to room temperature, so as to not kill the yeast!

 
Add in the whole wheat flour and beat on medium till smooth. 
 
If you'd like, you can add an egg into this mix, as it will give more nutrients and body. Not necessary, and if you don't, your bread will just be lighter and fluffier. I added one. :)

 
Add the rest of the flour and when pulls away from the sides, put on counter and knead.
Add more flour as needed to make dough only slightly sticky. If you have ever made buns before, the bread dough should be less sticky than that. Let it rise for 1-2 hours.
 
Once the dough has risen the first time, punch it down, cut it in half, pinching the bottoms, and placing each half into a greased loaf pan. Once it is in there, poke 3 sets of holes into the top with a fork.
 
 
Let the bread rise again, another 1-2 hours. I turned my oven on for about 15 seconds, just to let it warm up. Turned it off, and then put the bread in, covered with a plastic bag. 
 
 
Once the dough is done rising in the loaf pans, stick it in a preheated oven set to 375 degrees for 25 minutes.
I can't make my loaves the same size either. I see at trend...


You will know they are done when you take the loaves out of the pans, and knock on the bottom. If it sounds hollow, you're set. Let it cool, or not. And have a slice.


Thursday, February 9, 2012

Grilled cheese croutons

Have you ever wanted to eat some soup that NEEDS crackers in it, but you just don't have any crackers? Well. Do I have a solution for you! It's cheesey and easy and delicious!

I wasn't sure what to make for dinner the other night, so I just thought I'd stick with something simple. Tomato soup. But, I don't really like to eat tomato soup without crackers. I will sometimes, but I prefer it with. Now, I don't have any soda crackers right now, but I still wanted the soup, and since I sometimes eat tomato soup with grilled cheese (though more often it's peanut butter and jam so I can dunk it in. Don't judge!), I though, well, why don't I use those as crackers! Or, better yet, let's call them croutons so it sounds fancier.

Note: Your grilled cheese WILL get soggy, so if you are for some odd reason grossed out by that, don't do this. Though, if you dunk your grilled cheese into your tomato soup anyway, then you shouldn't be.

Ready for the step by step?

Get a can of soup, any soup. My victim for the evening was campbells tomato soup. Dump that sucker out into a pot, and then add a can of milk. Please, please add a can of milk and not water. I tried this with water once, because I hadn't made it for so long and forgot, and it was GROSS. If you're used to it with water, and have never had it with milk, try it. You will never go back to water.


While your soup is cooking, prepare your grilled cheese! I use cheese slices. Yeah, whatever. Cheese slices are good for grilled cheese. I prefer those over when making grilled cheese sandwiches. But use whatever cheese you fancy. Don't forget to either put butter on your bread, or grease your pan.


Cook your grilled cheese sandwich to perfection. Whatever your perfection is. Mine is golden on both sides. Not too dark, because then I just get mad. I don't like burnt bread!

Then! Cut your grilled cheese into little cubes.

Pour your soup into a bowl.

Now for the hard part.

Pick up the grilled cheese cubes and put them in your soup!! Ok ok. That wasn't hard I know. But that was the point. Kind of sarcastic.

Ta-da! Tomato soup with grilled cheese croutons. Simple. And a great alternative if you don't have any crackers :)

Caution: It's hot!

Wednesday, February 8, 2012

Banana Chocolate Chip Loaf turned into Muffins

Banana-na-na-na-na-na-na-na-na-na MUFFINS....sung to the tune of that Batman song....or something.

I like banana bread. But for some reason, I don't eat it as quickly as banana muffins. Ok, so maybe it's due to being slightly lazy because with the loaf, I have to actually cut it to have a piece, but with a muffin, I can just grab one and go. Convenient. Muffins are convenient.

I should have made these with whole wheat flour, because then they would have been healthier. I didn't think of that until afterwards though. Next time!

Do you know what is delicious with bananas? Chocolate. Duh. Bananas and chocolate, add some peanutbutter, and that's pretty much heaven. But I didn't add peanut butter either. Boy am I slacking.


I did add butterscotch chips too though! I wasn't sure how that would taste, so I only added them into a few of the muffins, but I'm sure glad I did, because they were delicious!

I was slightly concerned with how brown they ended up being on top, but they weren't burnt or anything, and not crunchy, so I think it was all good. The muffins needed half the time in the oven as the loaf does. Less surface area to cook, so it takes less time? Maybe something like that.


If anyone tries these with whole wheat flour, let me know how they are!

Banana Muffins:

Preheat oven to 350 degrees.

Ingredients
3 mashed frozen bananas
1 3/4 cup flour
1/2 cup margarine
1 cup sugar
2 eggs
1 tsp baking soda
1/2 tsp baking powder
1/2 tsp salt
1 cup chocolate chips
Cream margarine and sugar until fluffy. Add in eggs one at a time, and beat until smooth. Stir in the mashed bananas.

Mix dry ingredients together, and add to the wet ingredients slowly blending as you go.

Fold in chocolate chips. And when I say fold, I don't mean beat them in with your hand mixer or your electric mixer. I mean, take a spatula out of the drawer, and fold them in gently.

Either line muffin tins with papers, or spray them with Pam to grease them so the muffins come out easily when they are finished. If you're making a loaf, then grease the loaf pan.

If you want to make each of the muffins the same size, use an icecream scoop, or a 1/3 cup measuring cup to plop the batter into the tins. You've probably guessed that I didn't do that. I guestimated (yeah, that's a word), and surprise surprise, the muffins weren't the same size. But,  uh, some days I might want a bigger muffin than others. Yeah...that's why I did it that way.


Bake the muffins for 25-30 minutes, making sure you use a toothpick/knife to see if they are cooked. If you're making a loaf, bake it for 1 hour, checking the same way to make sure it is done. Don't worry if your muffins are a dark brown on top! Just make sure they don't burn. So if your oven runs hot, either turn the heat down 10 degrees, or cook for 20 minutes and check them before putting them in longer. Maybe wait until they are a little cooler to shove in your face though. They burn your mouth when they are still hot.

Monday, February 6, 2012

Pepper and sauteed mushroom and onion pizza

So I made pizza!

I never used to make homemade pizza, but, uh. It's really easy. And, in my opinion, better than bought pizza. It's healthier, or, well, you can make it healthier if you want. I also think it tastes better!

BUT IT'S EASY. Seriously. And you can put absolutely anything you'd like on it! I decided to try a combination that is good together on other things, but I hadn't actually tried on a pizza before.

And, since I should be honest...I used to hate mushrooms. I would never eat them. Well, I would never eat them if I knew they were in something. The absolutely delicious spaghetti sauce my mom made growing up didn't have mushrooms in it, right? WRONG. When I asked if there were mushrooms in it, I got "No! Of course there isn't." And then I grew up. And learned that yes, in fact, there were mushrooms in that sauce, just food processed together with a bunch of other vegetables, so we would have no idea. Sneaky sneaky mom. (Smart though.)

I like mushrooms now though! If they are cooked. And especially if they are cooked with mushrooms. Sauteed actually, in butter. And I sauteed the bejeezus out of these mushrooms. No word of a lie, they were in a frying pan for over half an hour. They got all brown, and caramelized, and delicious. I added the onions near the end, because I didn't want them cooked as much as the mushrooms, but I wanted them soft and transparent.

I just threw the peppers on top, chopped up and raw. It worked out well.

I used a whole wheat crust, and I got the recipe from here.

The only difference was in technique, rather than ingredients, as I've mentioned with a different bread recipe. I let the yeast sit with the lukewarm water for 10-15 minutes first, and added that in to the rest of the ingredients. I also only let it rise for about half an hour. This happened for two reasons.
1) I'm impatient.
2) My dad once said something about letting pizza dough rise for shorter time than bread, and so I listened to him.

Mostly number 1 though.

I suggest you do this. Even if you just try the crust, because it's quite good. Try your own combination. But take it from me....this one is good.

Mmmm pizza.


Wednesday, February 1, 2012

Brownies

Prepare yourself.

These are the best brownies ever. And I'm going to mess with them. But first, I'm going to show you the original.


I swear, the poor iPod photo does NOT do this justice. It's all gooey, and warm, and delicious.

These are Grandma Terry brownies, so, my dad's mom's recipe. They are best eaten warm, straight out of the pan. And the trick with these is that you MUST, and I mean it is an absolute MUST, ice these brownies while they are still warm. It's not your typical buttercream icing, but it is absolutely heavenly. These brownies will not disappoint, I promise.

But I have a confession to make. The original way to make these is with the nuts in them, but I prefer them without. I don't generally enjoy my chocolate with nuts. Well, sometimes I do...like chocolate covered almonds, but these brownies, in my opinion, are better without (sorry dad!). I will still eat them with nuts in them, because, who would turn down a brownie? But when I make them, they are sans nuts.

A single batch of these brownies is made in an 8x8 or 9x9 square pan, but a single batch makes a thin brownie. So, if you like thin brownies, then by all means, make a single batch. Or make a double batch, and put it in a 9x13 pan. I enjoy a nice hunk of brownie when I get to eat one, so I generally make a double batch, and put it in an 8x8 square pan. I suggest you do this as well. And of course, if you like a thick layer of icing, double that too. Though, this batch is just a single, apparently I didn't have enough eggs to make a double. Woops!

Someone told me once that brownies aren't supposed to have icing on them. What? That seems weird to me. In my mind, a brownie without icing is just...a slab of...well...brownie I guess, but not real brownie. Fake brownie. Incomplete brownie. Whatever you want to call it, a brownie without icing isn't a brownie!

Grandma Terry's Brownies

Ingredients:
1/2 cup margarine
1 cup sugar
2 eggs
1/2 cup flour
pinch of salt
3 tbsp cocoa
Cream the margarine and sugar together, but make sure that you use the right size bowl the first time, so you don't have to dirty another one. Like I did.
Once the margarine and sugar are creamed/fluffed, beat in the eggs.
Mix the flour, salt, and cocoa together, and then mix the dry ingredients into the wet ingredients. Put in an 8x8 dish and bake at 350 degrees for 25-35 minutes. Making sure you test with a toothpick, which will come out clean when they are done. Or a knife. If you don't buy toothpicks....
See the knife hole?


Icing

Ingredients:
1 tbsp margarine or butter
1 cup icing sugar
pinch of salt
3 tbsp cocoa
2-3 tbsp boiling water

Mix all of these ingredients together. The icing shouldn't be too thick. At least mine isn't! Add the water in one tablespoon at a time, so it doesn't get too runny.

And DO NOT FORGET to ice the brownies while warm. If there is one thing you follow to a T in this recipe, it is that. Ice while still warm.

Nomnomnom.

Oh yeah...like my counter?